Verifying domain ownership is the first step to getting started with Adquake as a publisher. This guide will walk you through the process.
There are two main methods to verify domain ownership:
Access your GTM account, select the appropriate container for your website, and go to the “Tags” section to create a new tag.
Uploading a file to your root directory.
Method 1: Adding a DNS Record
An easy way to verify ownership without technical skills. If you can access your DNS management panel, it’s quick and doesn’t require editing website files.
Steps:
Open the Websites page in your Adquake dashboard. Click “+ Add Website” and enter your website URL.
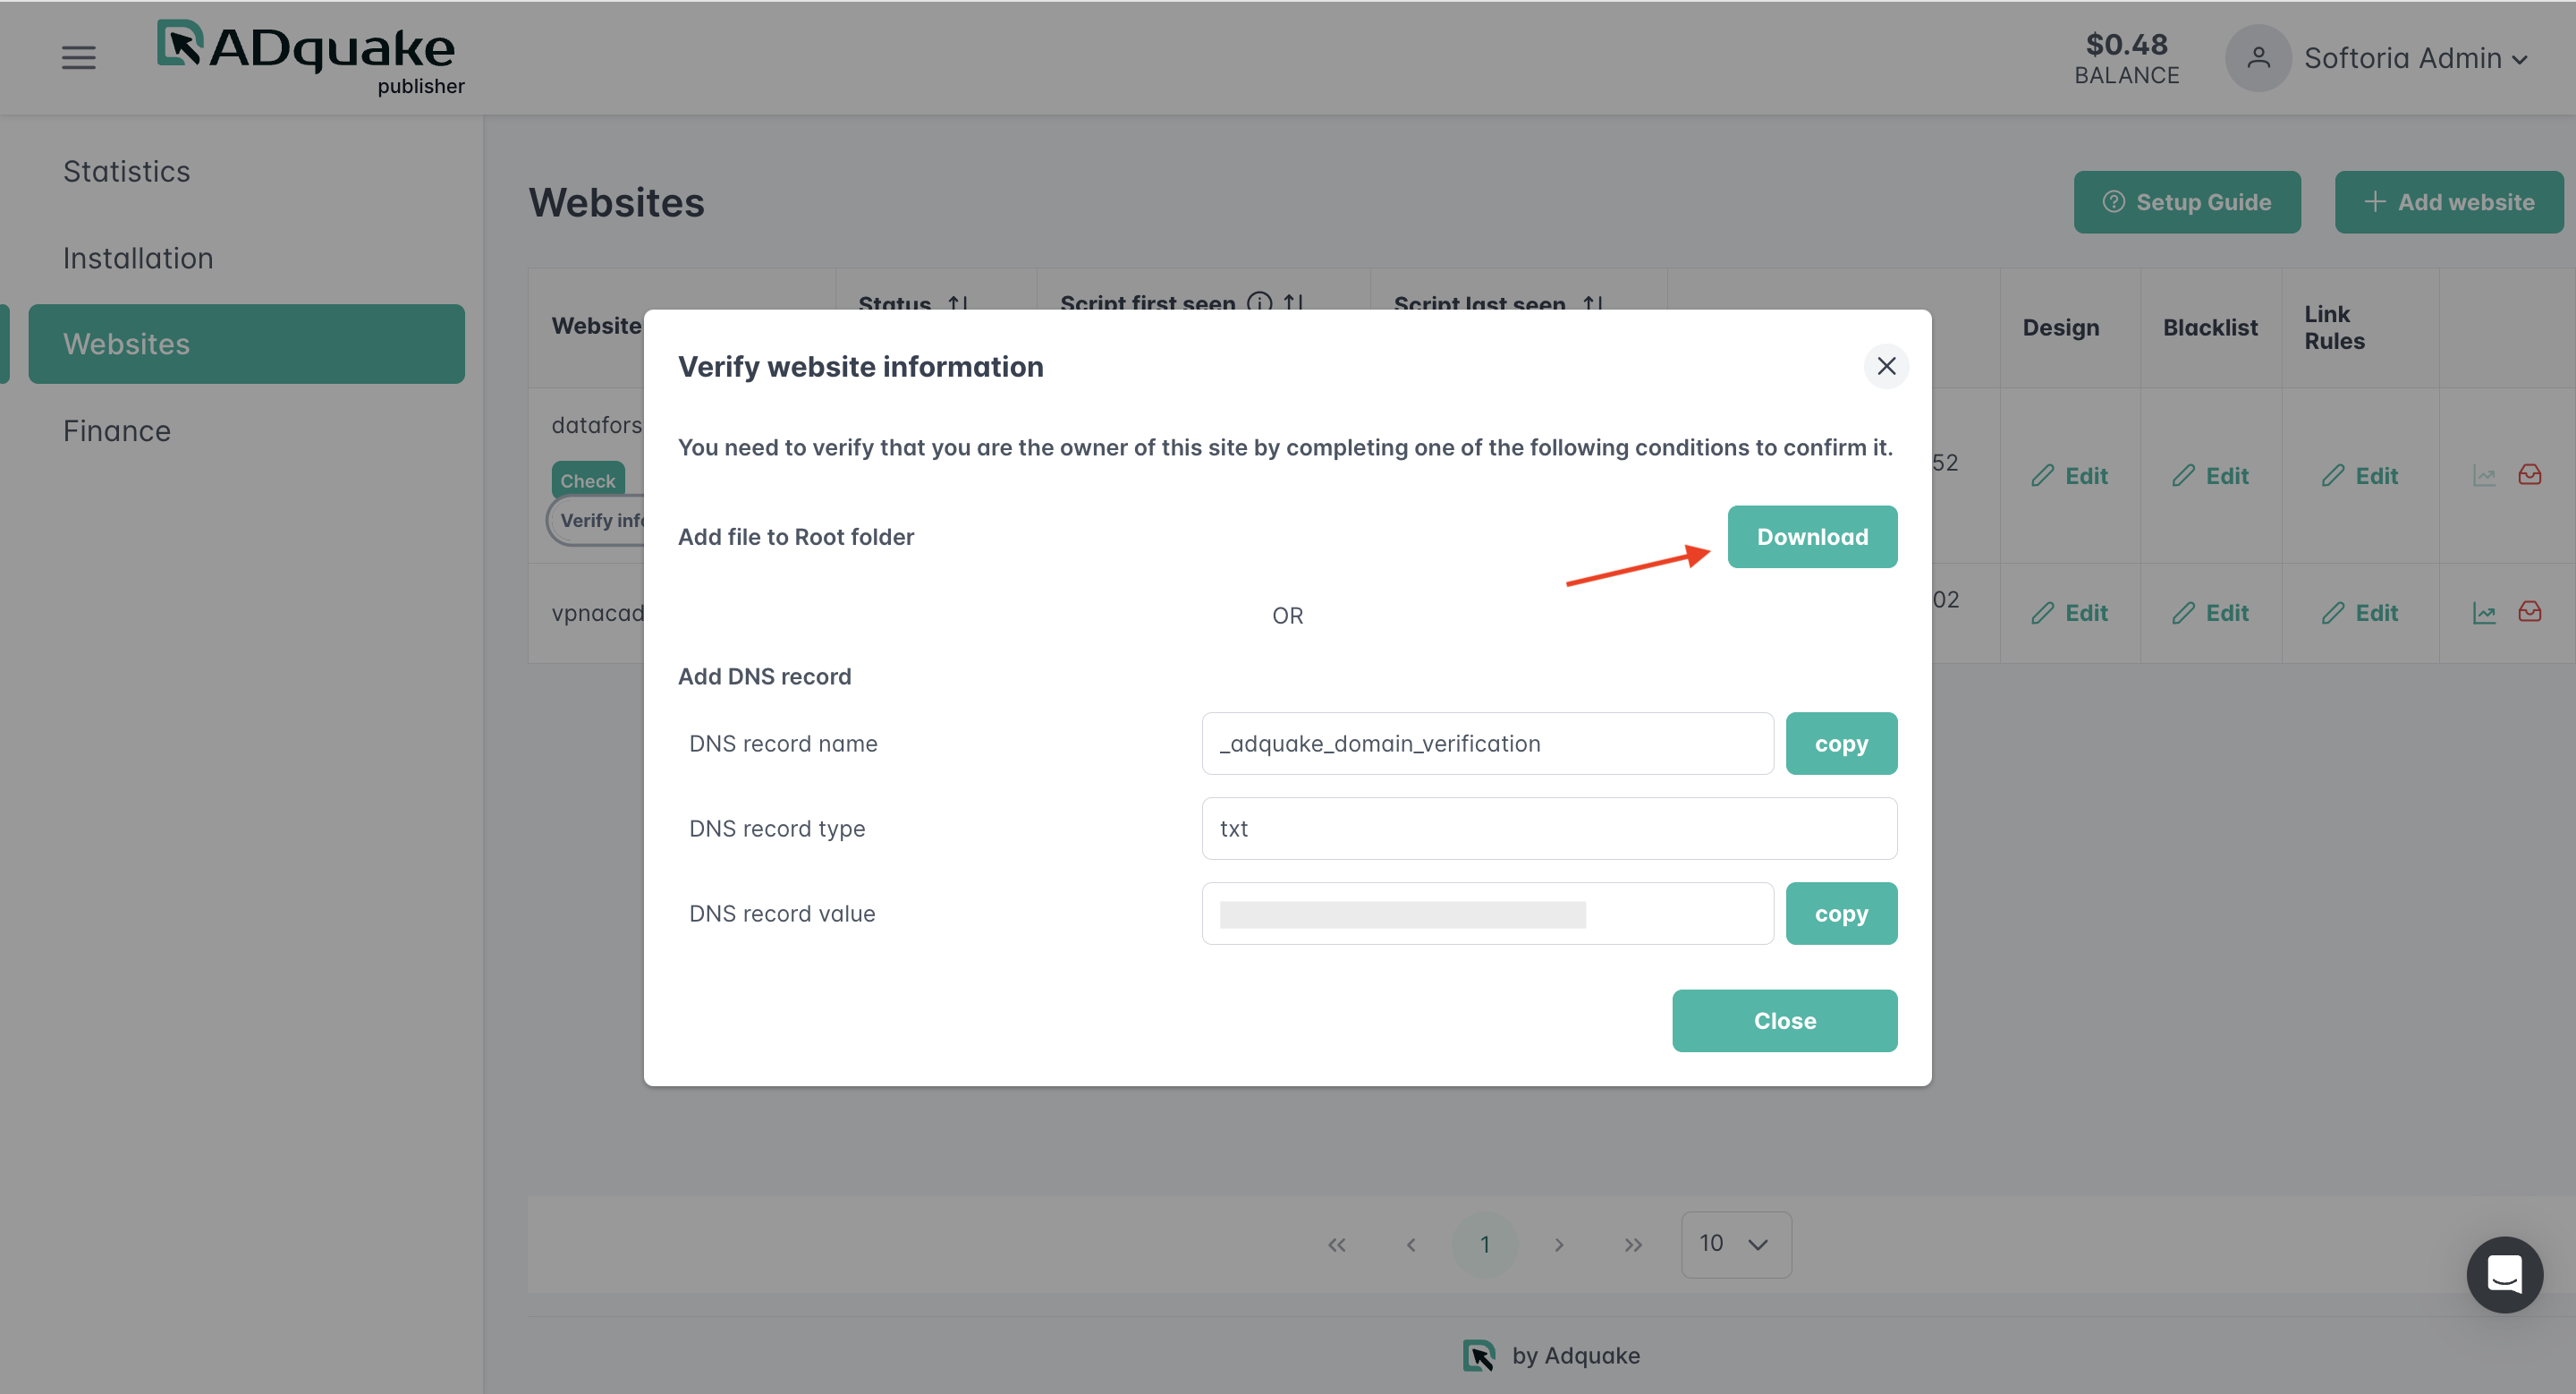
After adding the website, a popup will show the required DNS record details. This includes the specific name, type, and value you need to use for verification:
Sign in to your domain registrar or DNS hosting provider’s website (e.g., GoDaddy, Namecheap, Google Domains). Navigate to the “DNS Settings” or “DNS Management” section, usually found in the domain management area. Add a new TXT record using the name and value provided in the Adquake dashboard.
The exact steps for adding a record might vary slightly depending on your provider, so consult their documentation if needed. Once you save the record, the changes may take up to 48 hours to propagate.
Method 2: Uploading a File to the Root Directory
This method is suitable if you prefer to work directly with your website files and have access to the root directory. Use it if you are comfortable navigating the file system and uploading files to specific directories on your hosting server.
Steps:
Open the Websites page in your Adquake dashboard. Click “+ Add Website” and enter your website URL. After adding the website, a popup will provide a file to download.
Locate your website’s root directory. This is the main folder where your website’s files are stored on a server. It might commonly be named “www” “wwwroot” or “htdocs” but the exact name can vary based on your web server configuration.
Upload the downloaded file to the root directory of your website. Ensure the file remains in its original form and is placed directly in the root folder.
You can verify the upload by requesting the URL domain.com/adquake_domain_verification, replacing domain.com with your domain name. If set up correctly, the uploaded file should be accessible. Its content-type should be set to ‘text/plain,’ and the response content must match the file’s content exactly.
Next Steps
After verifying your domain ownership, your website status will change to “Moderate”, meaning our team will review your site to ensure it complies with our terms of use. Once the moderation is successful, the status will update to “Active”
At that point, you can proceed with setting up the LinkShifter script on your website. For detailed instructions, refer to this article.
By following these steps, you’re one step closer to becoming an Adquake publisher and unlocking the potential to monetize your website links. Great job on moving forward!